I can NOT believe it is already time to be getting out Halloween decorations! Where has this year gone?!?! Believe it or not, mid-October is upon us and it's about time to start pulling out pumpkins, ghosts, and spiderwebs!
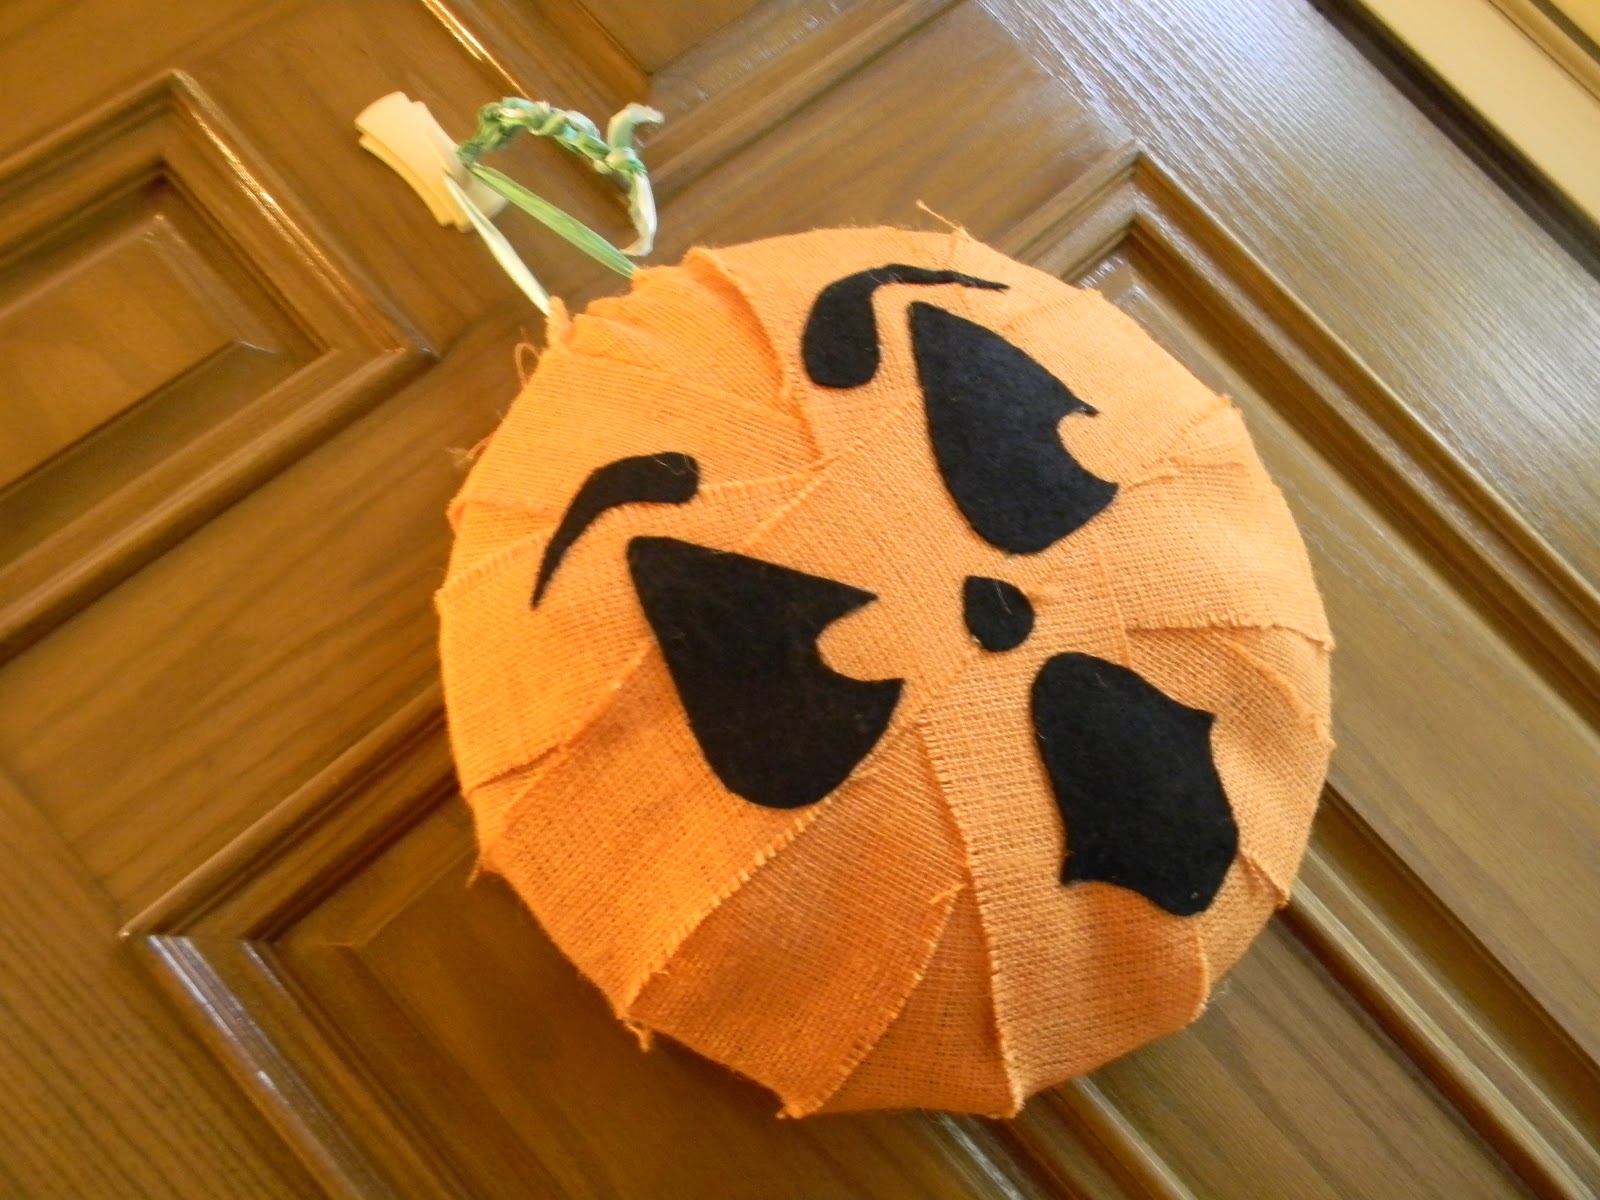
I made this wreath a few years ago and am so pleased that it's held up and still has a special place on our front door this time of year.

For the life of me I can't remember where I got the idea for this wreath. I feel like it was from some variation of Martha Stewart media (her website, maybe?) but when I tried to find it, I couldn't.
However, I DO remember how easy this was to put together. All you need is about 30 minutes and the following:
- a foam wreath form
- cardboard (I used a portion of a diaper box)
- Polyfill
- orange burlap (can be found at any craft store in the fabric section)
- black felt
- glue gun
- florists wire or ribbon
Have you seen this trick floating around on Pintrest? You take plumbing foam from Home Depot and make your own wreath form. It's MUCH cheaper than the foam wreath forms you can buy at Hobby Lobby. I've also seen pins where people use pool noodles to make wreath forms...
Start by tracing your wreath form onto the cardboard. Cut the circle out and place it on the back of your wreath making sure that the cardboard is not larger than the foam. Hot glue the cardboard to the back of the foam.
Place a good amount of Polyfill in the center of the wreath. You want it to mound up above the foam.
Cut your burlap into three inch wide strips. The length will depend on how big your wreath form is. Just make sure that the strips can wrap from one underside to the next.
Start by hot gluing the end of one burlap strip to the underside of the wreath. Wrap the burlap over the wreath making sure not to mash down the Polyfill too much. Secure the other end of the strip to the underside of the wreath.
Continue to do this until the wreath is fully covered with no Polyfill or foam showing. Be sure to secure the burlap in different directions to get a more natural look!
Then cut a Jack-o-lantern face out of your black felt. You can make your Jack-o-lantern goofy or scary! Secure the felt onto the face of the Jack-o-lantern using hot glue.
Attach florist wire or ribbon to the top of the wreath for a hanger. I simply threaded some ribbon under the top loop of burlap. You could also attach the ribbon to the back with hot glue since the wreath isn't too heavy.
Voilà! An adorable (or spooky!) Jack-o-lantern wreath! This thing has become a favorite in our house. Every year, the kids get so excited when I pull it out. It's as though it marks the beginning of the count down to Halloween!
Give this easy Halloween craft a try! And be sure to post a picture of your Jack-o-lantern in the comments!
No comments:
Post a Comment